
Welcome to the eighth tutorial of Navisworks® API series, this post is to cover how to transform the selected ModelItems, we will create an add-ins which includes a WPF window for user to interact with transform’s Axis and Value.
As usual, let’s start our project by setting up Navisworks® Add-Ins project in the visual studio, you can follow Creating Navisworks Add-Ins tutorial to set up the project. Whenever you are ready, in the Execute method, create two variables : doc to store the current document and items for the selected ModelItems. And an if statement for checking is there any selected ModelItem or not, and call our soon to be created WPF form/window. (figure 1.0)
Next, we are going to build a simple WPF window for user interaction. To add UserControl, Right-click on the Lab12_Exercise namespace > Add > New Item… and choose User Control (WPF) as shown in figure 1.1.

Change UserControl tag to Window, add an Axis image, RadioButtons for each Axis and a Textbox to input a transform value. And we also add two buttons : Close (to close the form/window) and OK (to override the provided transform value). (figure 1.2)

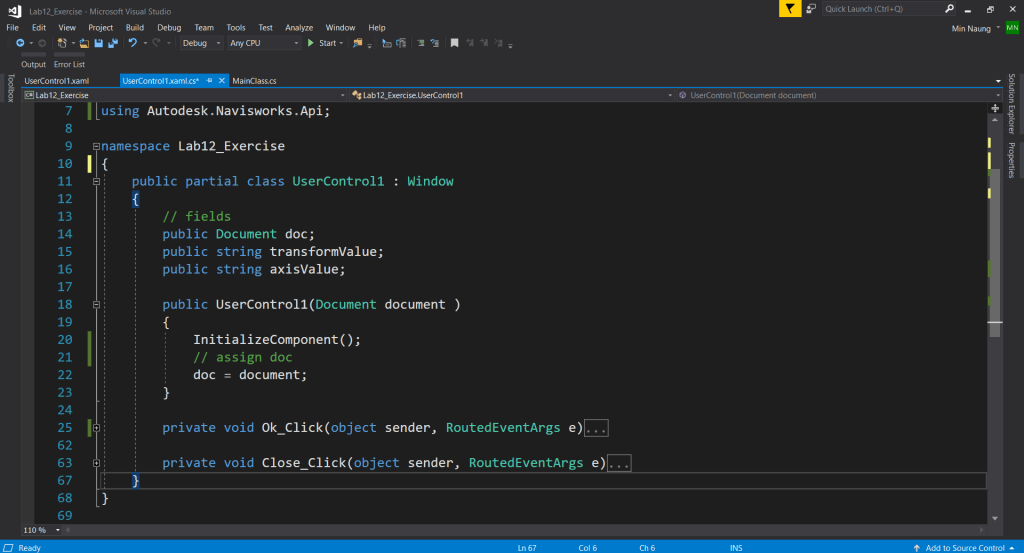
In our UserControl partial class, create three fields: doc for the current Document, transform for user input transform value and axisValue for user selected radio button axis value. And we have two click-event callback methods for Close and OK buttons. (figure 1.3)
In Ok_Click, click-event callback method, we have to find the selected button from the RadioButton group. And fetch the user input value from Textbox, convert to double value, and axis value from the selected RadioButton content. (figure 1.4)

For the transformation of ModelItems, first to create Transform3D with two arguments : Matrix3 and Vector3D. We set Vector3D value from user input axis and transform values with switch case statement. Finally, override transform value to the selected ModelItems by using OverridePermanentTransform method from DocumentModels.(figure 1.5).
For Close_Click callback method, just simply call Close() method to close the window.

Well, that’s all for this tutorial, you can find the complete source code from here, Cheers!
