
This post is to cover how to create an Autodesk® Navisworks® Add-Ins that we will create a file-path info dialog for the current file and the appended files using Visual Studio 2017v and Navisworks® 2020v.

Let’s start our project by launching Visual Studio and create a new project > choose Class Library (.Net Framework) and name it “FileInfoApp” (figure 1.1).

After this, you should be seeing namespace class window as shown in figure 1.2 below.

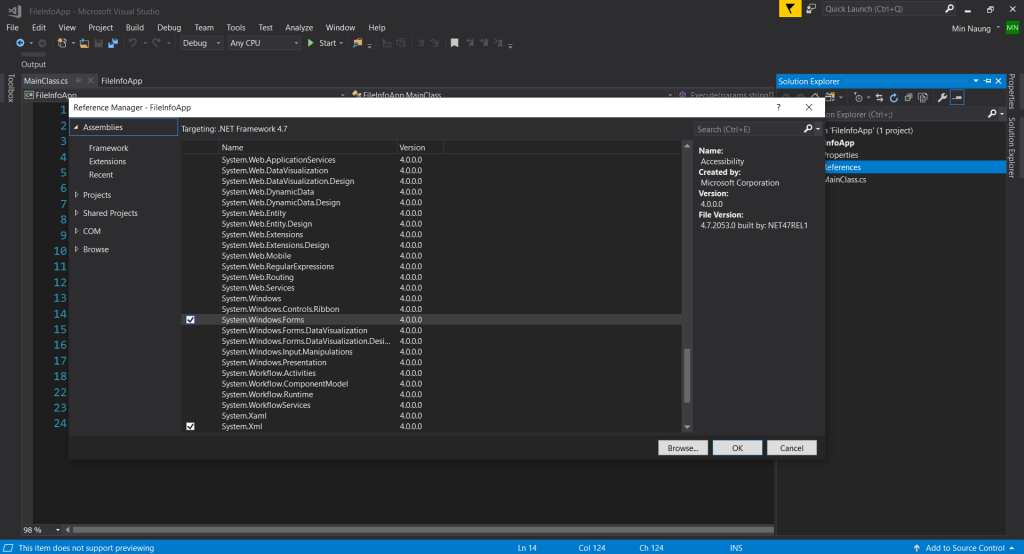
In the Solution Explorer panel, right-click on References > Add Reference > add Navisworks API library and WindowsForms library as our project references. (figure 1.3, 1.4)

Click “Browse …” button on Reference Manager Window and add these libraries Autodesk.Navisworks.Api.dll from Navisworks product installation directory, the default path is C:\Program Files\Autodesk\Navisworks Manage 20xx (figure 1.3) and System.Window.Forms from Assemblies. (figure 1. 4)
Select two libraries and right-click go to properties to change local copy value. (figure i1, i2)


Import library assemblies from Navisworks API and WindowsFroms references as shown in figure 1.5. *Note: to avoid ambiguous reference between Navisworks API and WindowsFroms, assign WindowsFroms assemblies as wf. (using wf = System.Windows.Froms;)

Rename the class name as MainClass, add an attribute PluginAttribute with Name, DeveloperId and optional parameters; DisplayName and ToopTip (figure 1.6). If you want to add more see the full list of properties here.

Just a short discussion for PluginAttribue attribute, if you have some experience/knowledge about creating Autodesk® Revit® add-ins, it is something like an add-ins manifest xaml file that contains meta data about the add-in.
Add AddInPlugin interface, this class can be used as a base class for adding an executable plugin with the implementation of its abstract method, Execute. Execute method has a list of string[] parameter and return an integer value, it could be 0. 1… (figure 1.7) . By default add-in will be shown in Tool add-ins 1 tab. See the list of other available locations from here.

In the Execute method, first get the Document object from the application with Application.ActiveDocument property. Create a variable name, message, to assign and display our current file and the appended files paths by using a WindowForms.MessageBox. To get the appended files paths, use Models property from the document object and from each of the model uses FileName property to get the particular file path. Finally, display the message string from the MessageBox.Show method. (figure 1.8)
public class MainClass : AddInPlugin
    {
        public override int Execute(params string[] parameters)
        {
            // get document from application
            Document document = Application.ActiveDocument;
            // info message - current file path with appended files
            string message = "Current File : " + document.CurrentFileName +
                              "\nAppend File : " ;
            // get appended models from current document
            DocumentModels models = document.Models;
            // each model
            foreach(Model model in models)
            {
                // get filepath with index
                message += "\n         "+ (models.IndexOf(model)+1).ToString() +". "+ model.FileName;
            }
            // display message
            wf.MessageBox.Show(message);
            // int return
            return 0;
        }
    }

The last part is to add Post-build Event Command Line from Build Events, xcopy/Y "$(TargetDir)." "D:\Autodesk\Navisworks Manage 2020\Plugins\$(TargetName)\" , to copy this project DLL to Navisworks installation directory’s Plugins folder. (figure 1.9)

To start external program for debugging, Browse... > Navisworks installation directory > Roamer.exe . (figure 1.10). Finally, build the project or press F5.

Well, this is the end of our Navisworks FileInfoApp tutorial. You can get the complete source from here. Cheers!

Hi there
Very useful tutorial. I am trying to build an NW AddIn that updates descriptions of Item Catalogue Item but cannot find a way to access this field (https://iscteiul365-my.sharepoint.com/:i:/g/personal/jrpre_iscte-iul_pt/ERBpGoHciQdKgC56Vuf3NZABpA54x9FEOpUoRnRqwMmyEA?e=B6uWfP). Is it possible?
LikeLike
Hi Ricardo, first of all thanks for your donation. And for your question :
Go to this post to learn how to find Item (https://twentytwo.space/2020/05/28/navisworks-api-search-modelitem-and-collect-properties/).
And next go to this post to learn how to add custom property ( https://twentytwo.space/2020/07/18/navisworks-api-com-interface-and-adding-custom-property/)
And the below link can lead to your solution :
https://forums.autodesk.com/t5/navisworks-api/modifying-or-deleting-user-defined-properties/td-p/7861363
LikeLike
I do not need to access model items (objects). I need to write on the Description of the Item Catalogue entry. I try to explain it here: https://iscteiul365-my.sharepoint.com/:i:/g/personal/jrpre_iscte-iul_pt/Edn-3RI6NBlFnYIUOdDS39MBYh3jqnFEwqvd8GhAe5LX0g?e=det1yx.
I did not find a way to access it on the API documentation, but maybe I’m missing something.
Thanks.
LikeLike
How about this one – https://knowledge.autodesk.com/support/navisworks-products/learn-explore/caas/CloudHelp/cloudhelp/2020/ENU/Navisworks/files/GUID-5C6AE212-ACE5-4B08-A591-C71245F78A09-htm.html#:~:text=Create%20custom%20catalog%20data%2C%20such,between%20your%20Items%20and%20Resources.
LikeLike
Hi, thanks. I guess I explained myself poorly. I need to access not the model object (item), but the Item Catalogue item. I try to show that here: https://iscteiul365-my.sharepoint.com/:i:/g/personal/jrpre_iscte-iul_pt/Edn-3RI6NBlFnYIUOdDS39MBYh3jqnFEwqvd8GhAe5LX0g?e=YEBgCO
LikeLike
I think, these catalog data may able to access via Quantification API. You can check out :
https://apidocs.co/apps/navisworks/2018/87317537-2911-4c08-b492-6496c82b3ee6.htm
https://forums.autodesk.com/t5/navisworks-api/quantification-api-resources/td-p/7202852
LikeLike
Why can I not get the Tool add-ins 1 tab to show up even after moving the .dll to the plugins folder?
LikeLike
Hi Brian, can you try with location attribute as shown in this sample : https://apidocs.co/apps/navisworks/2018/T_Autodesk_Navisworks_Api_Plugins_AddInLocation.htm
LikeLike
Still gives me nothing. It does tell me I need administrator permission to copy the .dll to the Plugins folder but it still copies it in there which makes me think it would work. I am not sure if that is preventing Navis from reading the folder on open or not.
LikeLike
never mind, I got it. thanks for your help!
LikeLiked by 1 person
Hey Brian. I have the same issue with Navisworks 2023. Could you please share your solution?
The only one solution what I found is to use Navisworks 2020 for this learning path.
LikeLike
good evening i need a plug in to import report test (excel file) into NVW ,ANY HELP ???? …THANKS
LikeLike
Hello, I made a plugin and it works good on Navis Manage 2021. But if I copy the same plugin folder to the Plugin folder of Navis Manage 2022 – plugin does not appear in application tabs.
Any suggestion?
LikeLike